
Mixing techniques in SpectraLayers Pro
A peak into the world of Samplitude and Sequoia
https://www.magix.c…
Spectral Casting/Spectral Molding presents a completely new paradigm for audio mixing and sound design. In this article, we'll take a look at these revolutionary tools in SpectraLayers Pro. We'll focus here on the concepts so that you can gain a solid understanding of what these tools do and an appreciation for how different they are than anything you've used before. When you become familiar with these concepts, you'll be able to apply that understanding and work in a completely different way in both mixing and sound design.
In traditional audio mixing, the mixing engineer will often attenuate an entire sound to bring a different sound out in the mix. For example, the engineer might lower the volume of the lead guitar in order to allow the vocal to be heard more clearly.
Spectral Casting takes a much more surgical approach to this type of mixing problem. Figure 1 represents a guitar track and a vocal track in a music mix. With both tracks at full volume, the Guitar track overpowers the vocal track. In the figure, you can plainly see the word GUITAR and while you can also see the word VOCALS, you have to work a little harder to read it.

Figure 1: In this visualization of a music mix, the guitar track overpowers the vocal track.
In the traditional mixing approach, you might attenuate—or "turn down"—the guitar track in order to hear the vocals better. This is emulated in Figure 2 by dropping the opacity of the word GUITAR. While you can certainly "hear" the vocals better, we've turned the guitar down drastically so that it is now very low in the mix.

Figure 2: We've made the vocals stand out by pulling the guitar way back out of the mix.
Instead of turning down the entire guitar track, what if you could turn down just the guitar frequencies that interfere with the vocal frequencies, and thus mostly preserve the integrity of the guitar track while still making the vocal stand out in the mix? As you can see in Figure 3, it's almost like you're cutting a hole in the guitar track just where you need to in order to give the vocal track more room to "breathe" or be heard. In fact, it's not almost like that; Spectral Casting is exactly like that. And that brings a completely different mindset and approach to audio mixing.

Figure 3: Through Spectral Casting, we can essentially cut holes in the guitar just where we need to in order to make the vocals stand out more.
Figure 4 shows the vocal track hidden so that you can clearly see the holes in the guitar track.

Figure 4: Spectral Casting "cuts" holes in the guitar track to create more room for the vocal track to breathe.
Now take it a step further. What if you could take those frequencies that you removed from the guitar track, preserve them, and utilize them with complete flexibility? That's what Spectral Molding does. With Spectral Molding, you have access to the removed guitar frequencies and this is called an impression. Figure 5 shows the impression in the example we've been using so far. What makes this a fascinating creative trip is that the guitar frequencies in the impression utilize the sonic signature of the vocal harmonic structure, and that results in some pretty crazy sounds!
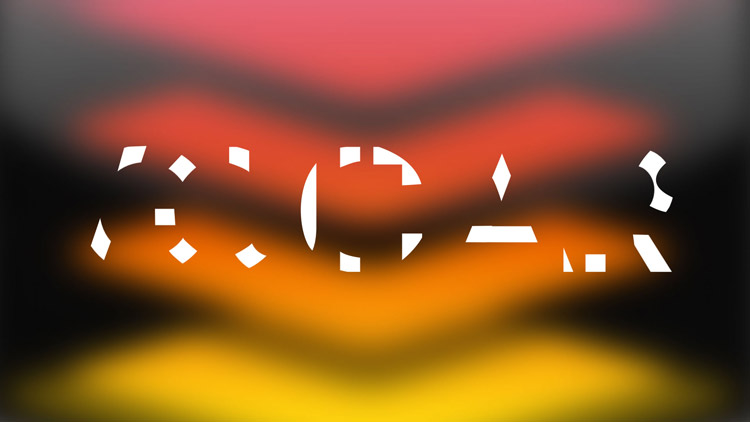
Figure 5: An impression consists of only those frequencies that exist in both layers.
Let's take a little closer look visually at how this works and then we'll move into how the process actually looks and sounds in SpectraLayers Pro.
Imagine that the red pattern in Figure 6 is the frequency structure of your guitar track. The blue pattern represents the frequency structure of your vocal track. Clearly the "guitar" is too loud in the mix as you can't see the blue where the red pattern is.
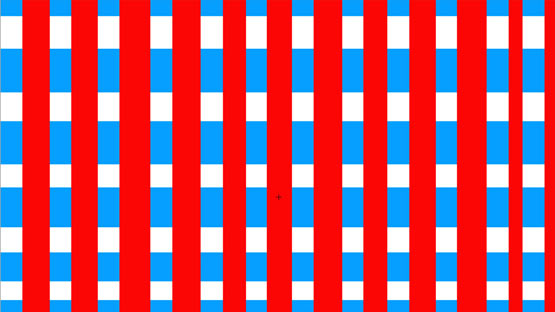
Figure 6: The red "guitar" frequencies overpower the blue "vocal" frequencies.
In traditional mixing, in order to hear the vocal better—in this case, in order to see the blue better where it intersects with the red—the engineer might turn down the guitar. We can emulate that by dropping the opacity of the red layer. Notice in the left half of Figure 7 that when the opacity of the red layer is lowered down to 20%, you can indeed begin to see the blue layer more effectively.
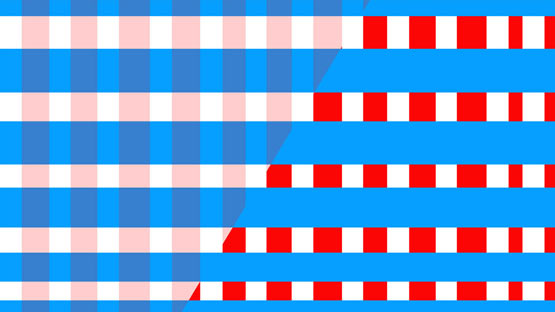
Figure 7: The left side of this image represents a traditional mix, while the right half represents a Spectral Casting mix.
But there are two issues you'll quickly notice. First, you've clearly lowered the opacity of the red everywhere, including where it does not intersect with the blue. In our example, you've turned all frequencies of the guitar down—even frequencies that don't intersect with the vocal frequencies and thus don't necessarily need to be turned down.
The second issue you notice is that where the red and the blue intersect, you start to see a mix of the two colors. In other words, the frequencies of the guitar mix with the intersecting frequencies of the vocal and thus "color" the vocals differently, just as the red mixes with the blue to create a new color.
In the audio world, this isn't always a bad thing. In fact, it could be exactly what you want. But with Spectral Casting you can do things differently and achieve interesting mix results. In Spectral Casting, instead of attenuating all frequencies of the guitar (the red layer), we can turn down, or completely eliminate, just those frequencies that intersect with the vocals, leaving all other frequencies untouched. This results in a completely different kind of mix.
To visualize this, compare the left half of Figure 7 to the right half. In the right half, instead of attenuating all guitar frequencies (the red), we've eliminated only the frequencies that intersect with the blue vocal frequencies. All guitar frequencies that do not intersect with the vocal frequencies remain unaffected. This results in a completely different type of mix where you can see the blue completely, but also see the red completely where it does not intersect with the blue.
Visually, you can compare the two halves of Figure 7 to easily see the difference between these two mixing scenarios and when you use Spectral Casting, you create exactly the same mix difference in the aural realm as you see here visually. And that's Spectral Casting.
Spectral Molding does the same thing, with one important difference: Spectral Molding gives you access to the deleted material and you can then do whatever you want with it. To visualize this, look at Figure 8. Here we pasted the material from the red layer that we'd previously cut back into the picture and added a Noise filter to this pasted material so you can easily distinguish it from the original red layer.

Figure 8: In Spectral Molding, you can preserve the frequencies that intersect between the two layers and work independently with that audio data, as we have here by adding a noise filter to the intersecting frequencies.
Notice that now you can mix that layer in however you want to. If this were an audio track, you could add a filter to it, just as we did here. Figure 9 shows just the result of the Spectral Molding process, which we call an impression. So, you can work with the impression alone or in conjunction with the rest of your mix. Notice that the impression uses just the frequencies that are present in both original layers. This makes for some very interesting effects in SpectraLayers Pro and since this material sits on its own distinct layer, you can do anything to it that you want to.

Figure 9: The result of Spectral Molding is a distinct layer that holds only the intersecting frequencies, which we call an impression.
So, let's take this theoretical illustration and see how it actually works in SpectraLayers Pro. Figure 10 shows a project in which you can see only the vocal layer of a vocal/music mix. Figure 11 shows just the music layer.
Listen to the vocal
Listen to the music
Make note of what the narration harmonic patterns look like in Figure 10 and make particular note of the density of the music frequency patterns and how the frequencies are fairly unbroken over time in Figure 11.

Figure 10: This picture shows the vocal harmonic structure patterns.
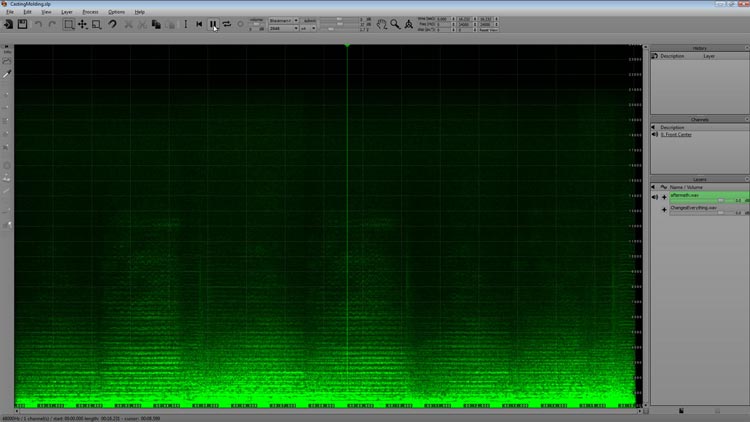
Figure 11: Notice the relatively unbroken appearance of the music harmonic structure over time.
When we use Spectral Casting to cast the music against the vocals and then hide the vocal layer, you can very clearly see the holes that have been cut into the music layer. Just as in our visual example earlier, the casting process has created a hole in the music track everywhere that music frequencies intersected with vocal frequencies, thus enabling the vocals to stand out more. Look at the difference between the music patterns in Figures 11 and 12 where you can plainly see the holes that have been cut into the music by Spectral Casting.
Listen to the results of Spectral Casting
Note that the results do not sound great here because we used very aggressive settings that would make the effect more obvious. You can hear the music fading in and out to make room for the vocal.
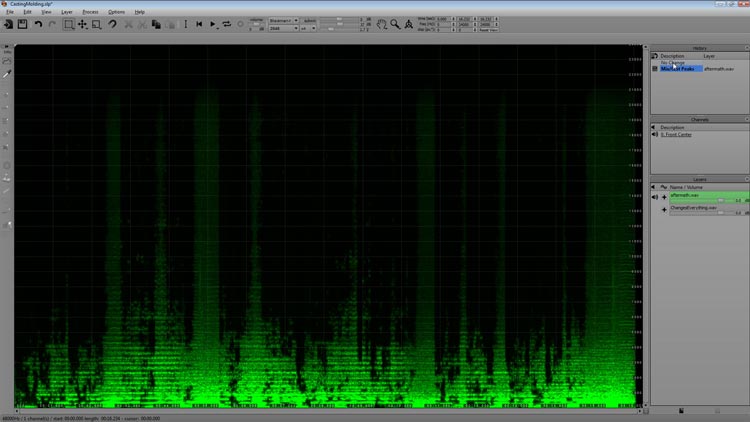
Figure 12: Spectral Casting has cut holes in the music layer which will enable the vocals to stand out more in the mix.
As we saw earlier, molding is basically the same as casting except that you have access to the impression and you can fold it into the final mix however you want. In fact, you can mute both of the other layers and listen to just the impression in the mix.
Figure 13 shows what the impression frequency patterns look like in this project. While it's difficult to see visually in this figure, it's easy to hear the results of this impression.
Listen to the impression
What you hear is the intersection of the music layer frequency structure and the narration layer structure. This results in a unique vocoder-type sound that is part narration and part music. It yields a robotic, musical narration. Since this impression is on a separate layer, we can utilize it however we want to, which gives us completely open-ended sound design possibilities.
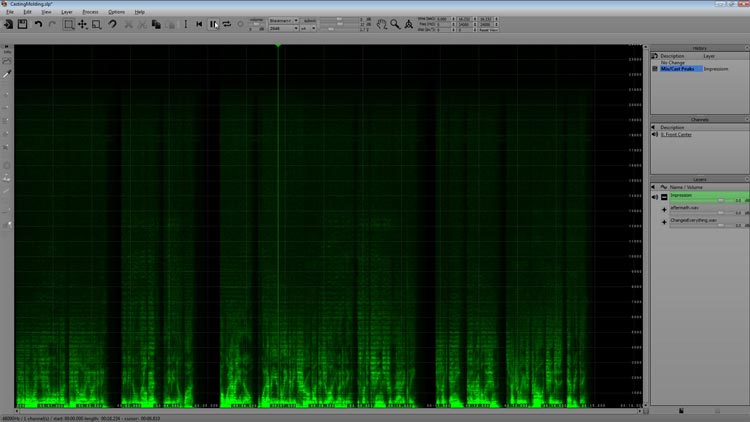
Figure 13: You can mix the impression (which you get as a result of the Spectral Molding process) into your mix however you want since it sits on a separate layer.
We've just looked at the basic concepts of Spectral Casting/Spectral Molding. We couldn't explore all of the possibilities of these unique audio tools here because no one yet knows what all of those possibilities are! SpectraLayers puts the technology in place. Now you can use it to invent the future of mixing and creative sound design!
Comments

I think this is amazing technology. I watched a vid with Tim Dol
I think this is amazing technology.
I watched a vid with Tim Dolbear last year where he demo'd the beginnings of this technology showing the basics of MAGIX spectral editing; what it could do and how it worked; by using it to get rid of an over abundance of fret noise in an acoustic, as well as sonic restoration of an old LP record with clicks and pops... I thought the process worked incredibly well.
My only thought (hope?) is that this tech isn't used to filter out the "Human Element" of music, that when it creates these "holes" for other things to sit in, that it's not also removing things that we might not want removed.
There are those who might do things to the extreme...like removing the sound of the bow on the strings of a violin, or the sound of the fingers on the fretboard of an acoustic, things that I find sonically pleasing.
But we can't blame the processor for that. ;)
These are all just tools, it's up to us to use them in ways that enhance and improve our recordings, and not used detrimentally, by removing every little nuance.
Technology is an amazing thing ... editing, modeling, simulation and sampling...
Some of these are fantastic, others maybe not so much right now, but as the process grows, and further discoveries and advancements are made, some truly incredible things are happening out there. :)
IMO
-d