Some time ago, I sold my Crane Song Avocet (which was awesome). I was doing less and less music work and more and more electronics, so it was time to simplify. I built a very simple completely passive monitor controller with just the bare minimum features. It was just for me, so it was not pretty but functional. It has a stepped attenuator, polarity, L& R mutes and Mono.
Well I now want to add a few features. Starting with a Headphone amplifier, simple LED meter, and power supply. I am also toying with the idea of switching the pads in via relay, so a micro with an encoder may be in order.
Tags
Comments
Here is my concept so far: I will need a simple DC power supply,
Here is my concept so far:
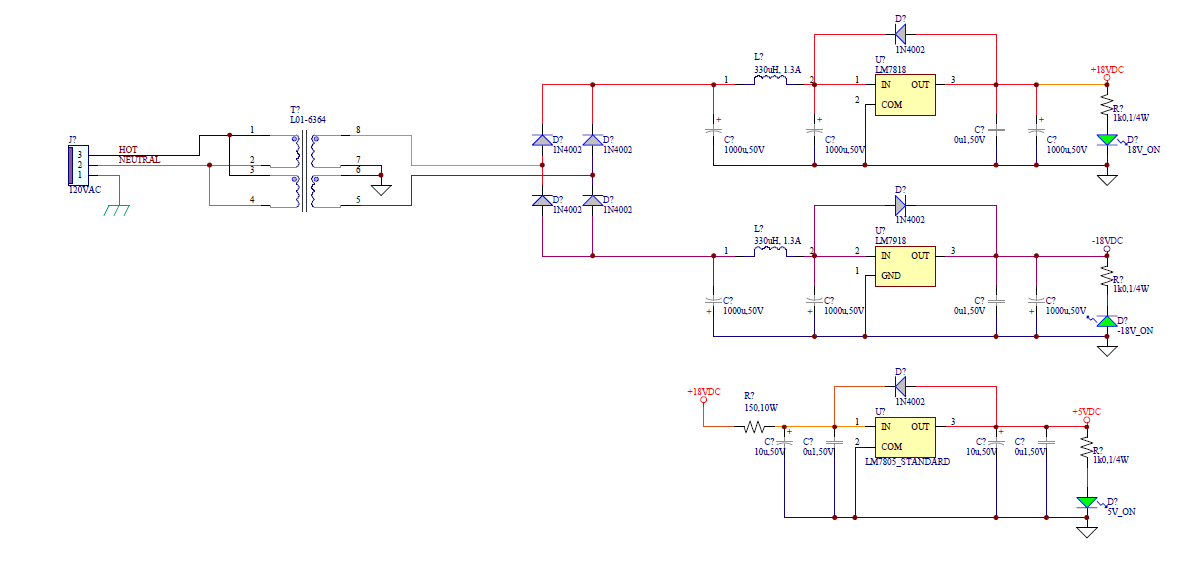
I will need a simple DC power supply, like this:
The power supply will be needed for the simple meters I want to add. The meter will be fed from either before or after the attenuator. Nothing fancy here, but something like this off the Lm3916 data sheet... times 2(Left and Right):
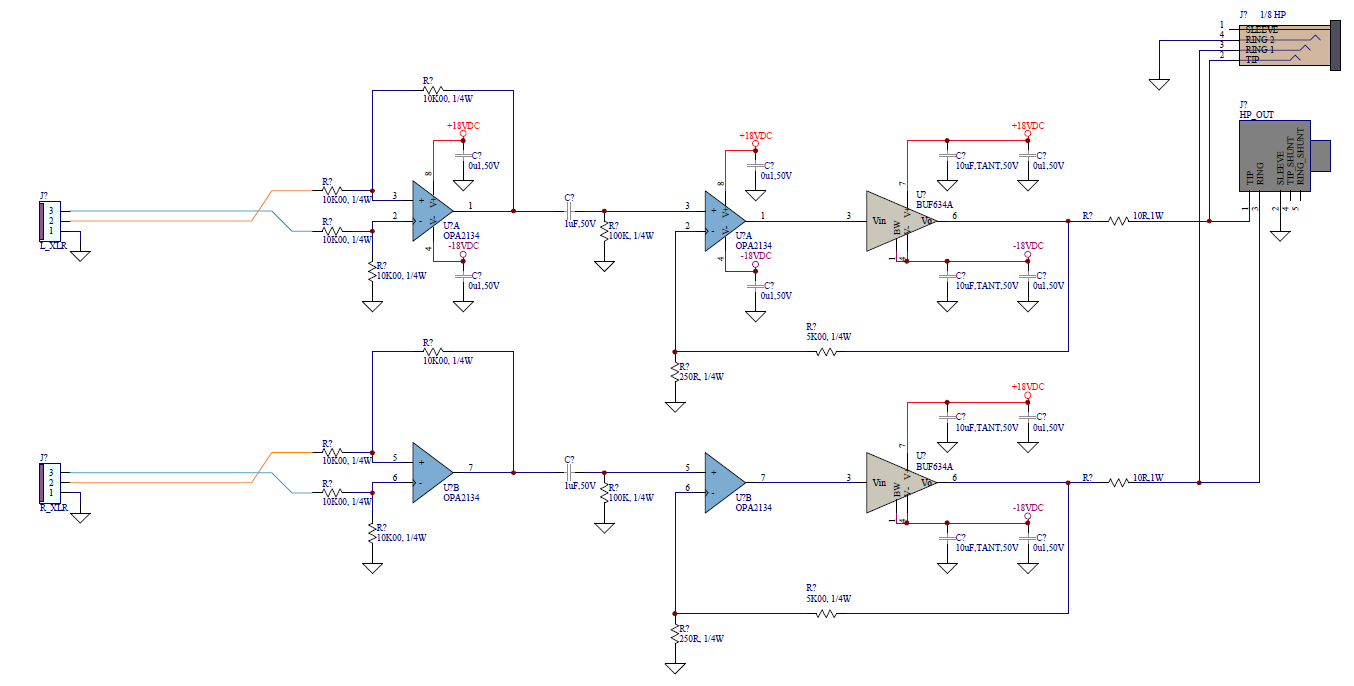
Then I want to add a decent headphone amplifier, which will be fed off the signal from my Lynx L22. I want it to have both 1/4" and 1/8" jacks...I am always searching for adapters. I need to add a volume adjust still, but something like this:
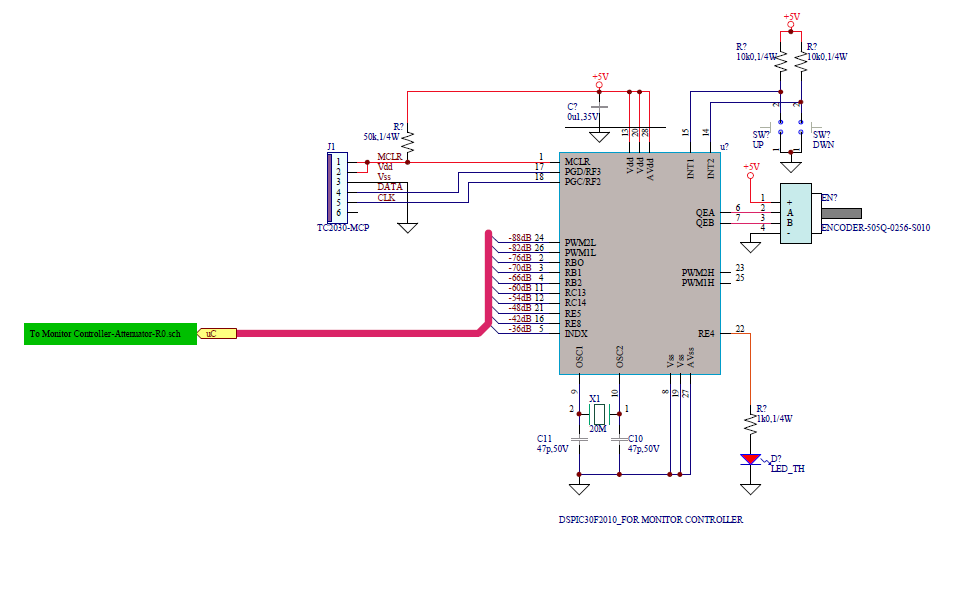
I want to add a small micro-controller to control the attenuator via an encoder, I like PIC...
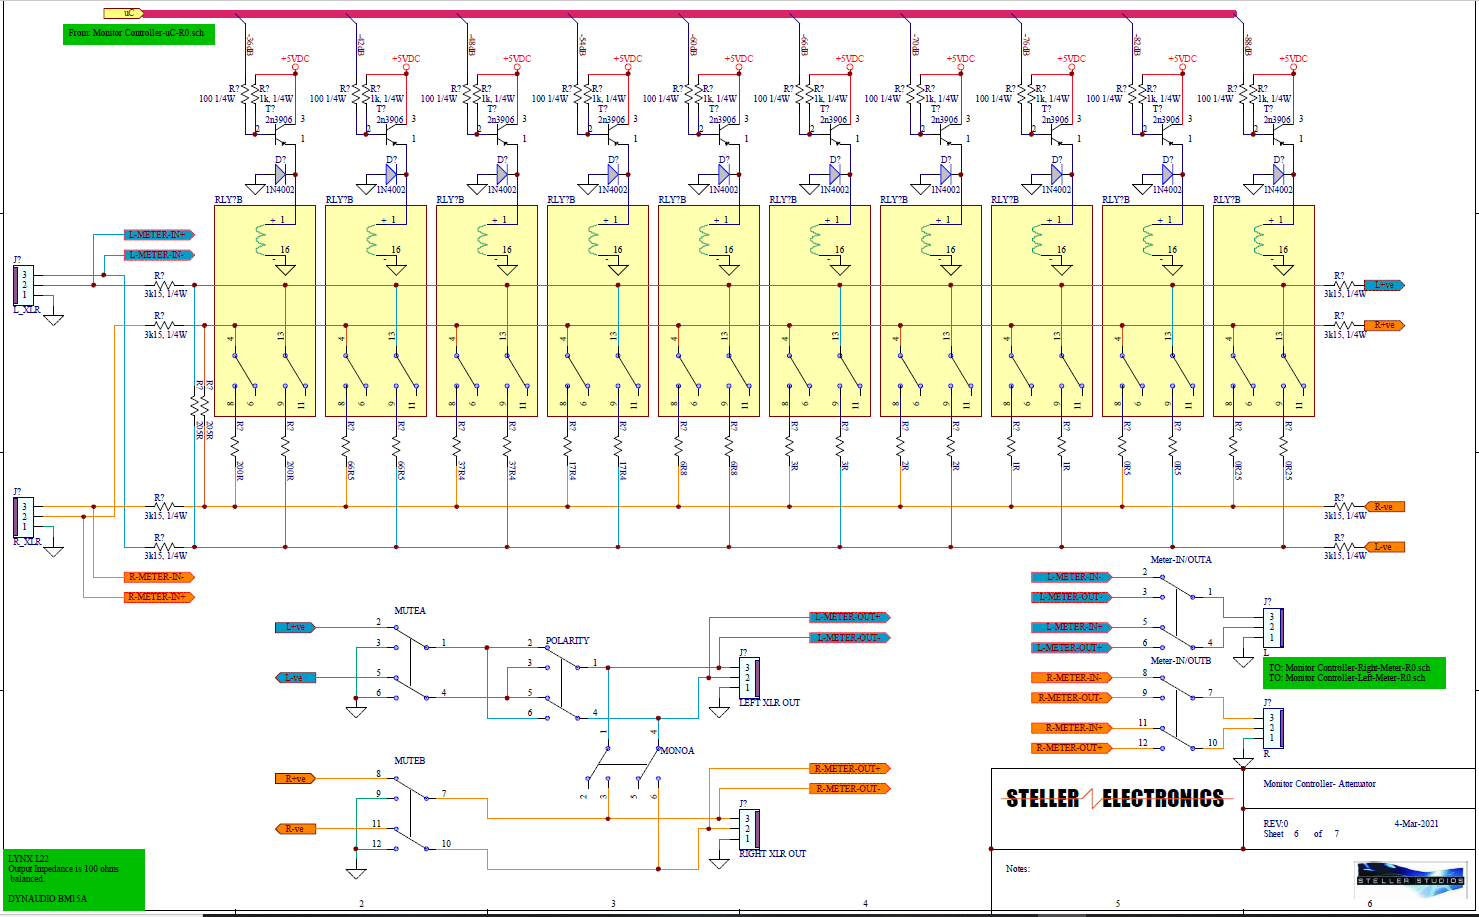
Last the star of the show the attenuator. I want this to relay driven. I am not fixed on the values yet, I am dreaming up a way to reduce relays buy switching combinations. But this is the concept:
Oh and the mute, polarity and Mono will be done with simple switches like the original....
That's what I call a really simple box. Or maybe not. Since
That's what I call a really simple box.
Or maybe not.
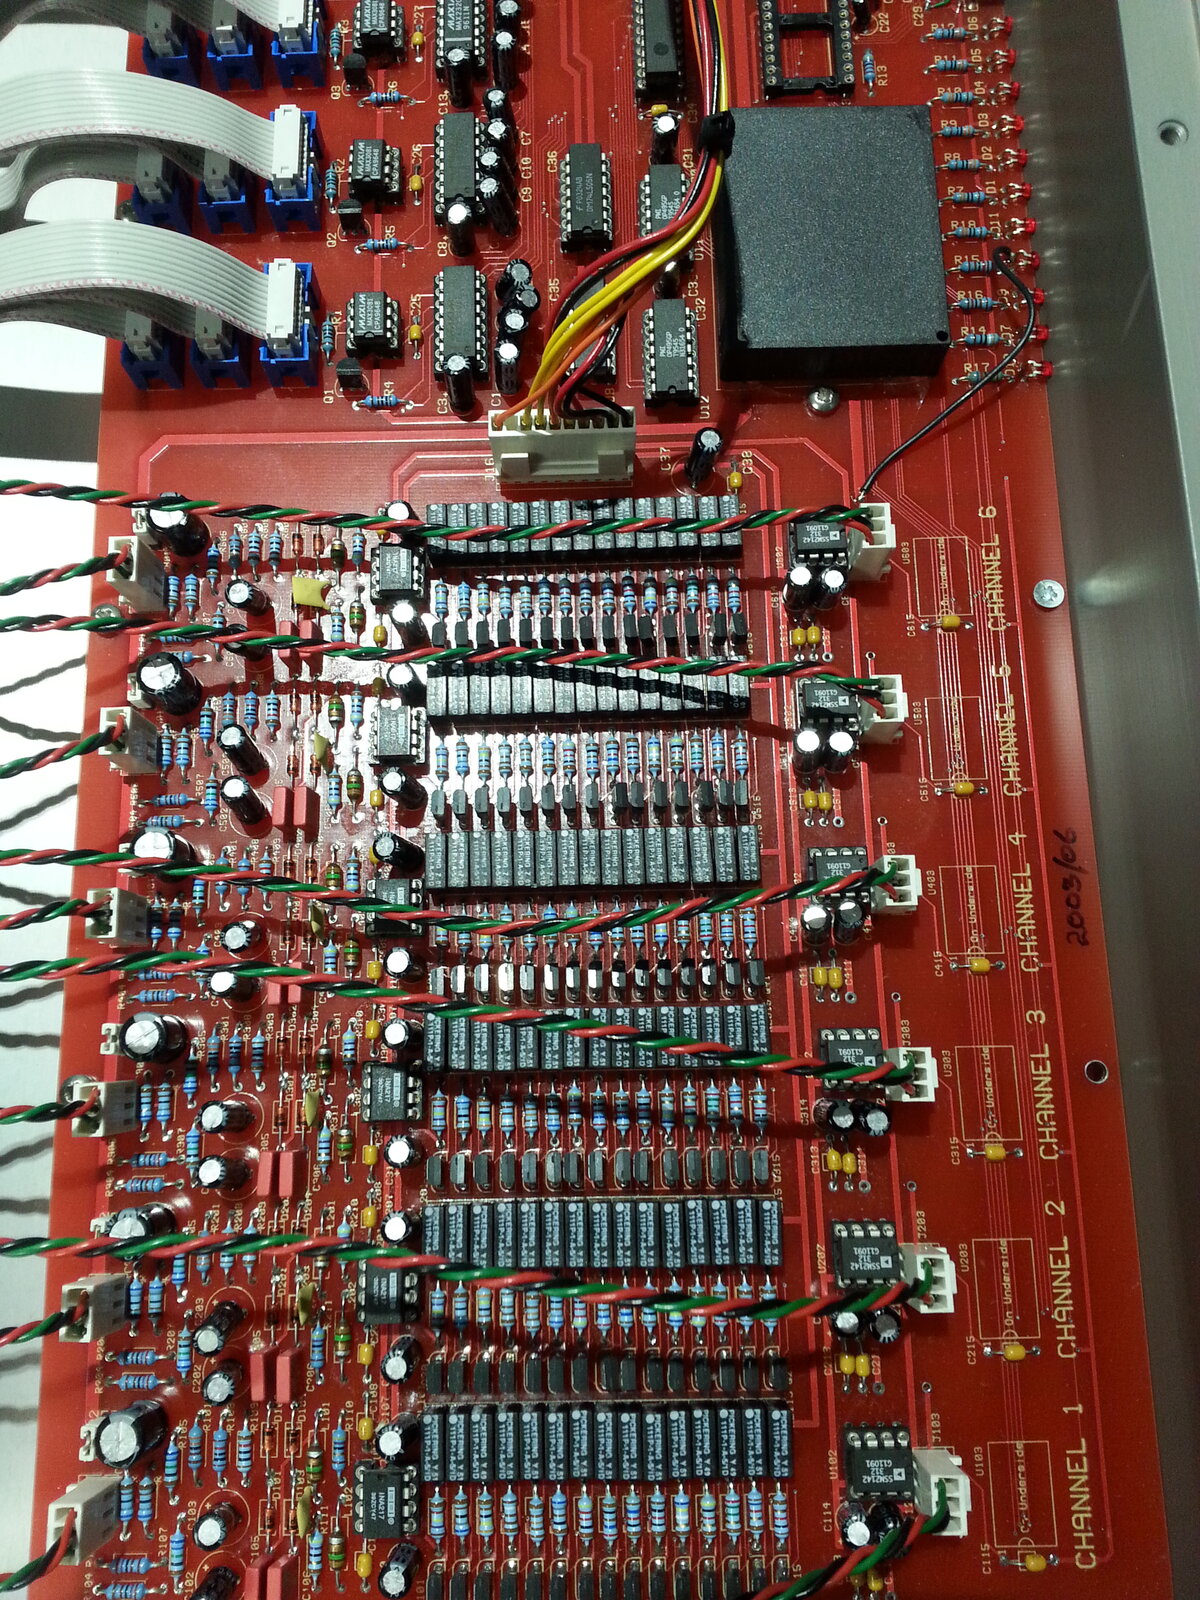
Since you were talking about PIC-controlled attenuators, I thought I would share a photo of this box. I bought it recently on Ebay for not a great deal of money from a man who refused to say how he acquired it.
It's 6 channels of remote-controlled microphone pre-amp and digital I/O, with gains relay-switched by a PIC (goes in the socket upper right). The vendor could not get it working, as he got it with zero information about the control commands to send to the PIC. I took the PIC out and reverse-assembled the code. It's fairly straightforward, except for the digital I/O interlocks, which I'll remove.
The mic channel amplifiers are INA 217s and SSM2142s.
I've owned a few passive monitor controllers. The main issue the
I've owned a few passive monitor controllers. The main issue they can have are inaccurate levels when changing volume. SPL makes the best passive I've used. If you are able to address that in your design, that would be a big plus. https://recording.org/community/threads/event-opal-monitors.54150/page-4#post-431305
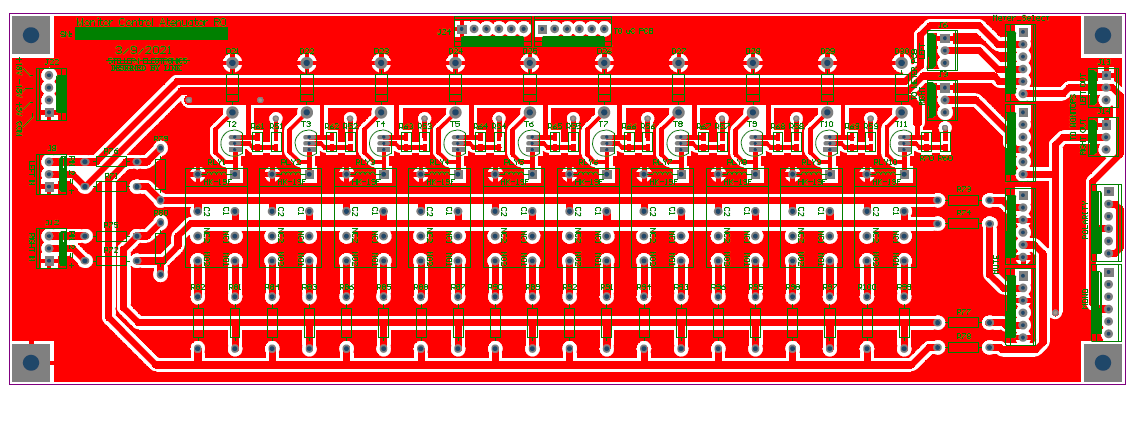
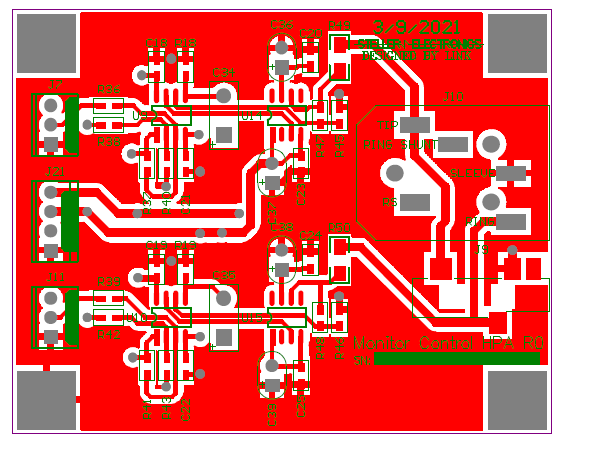
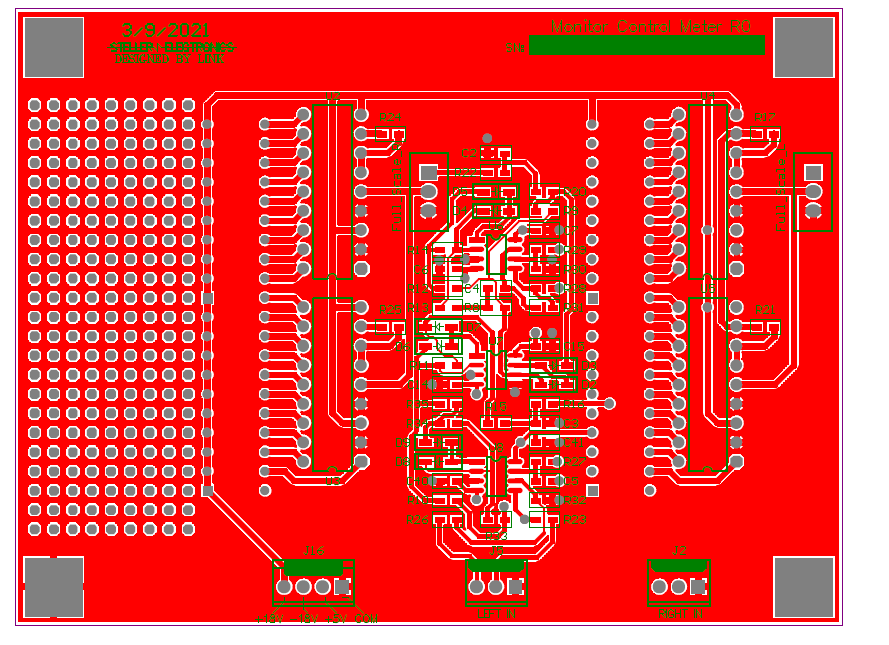
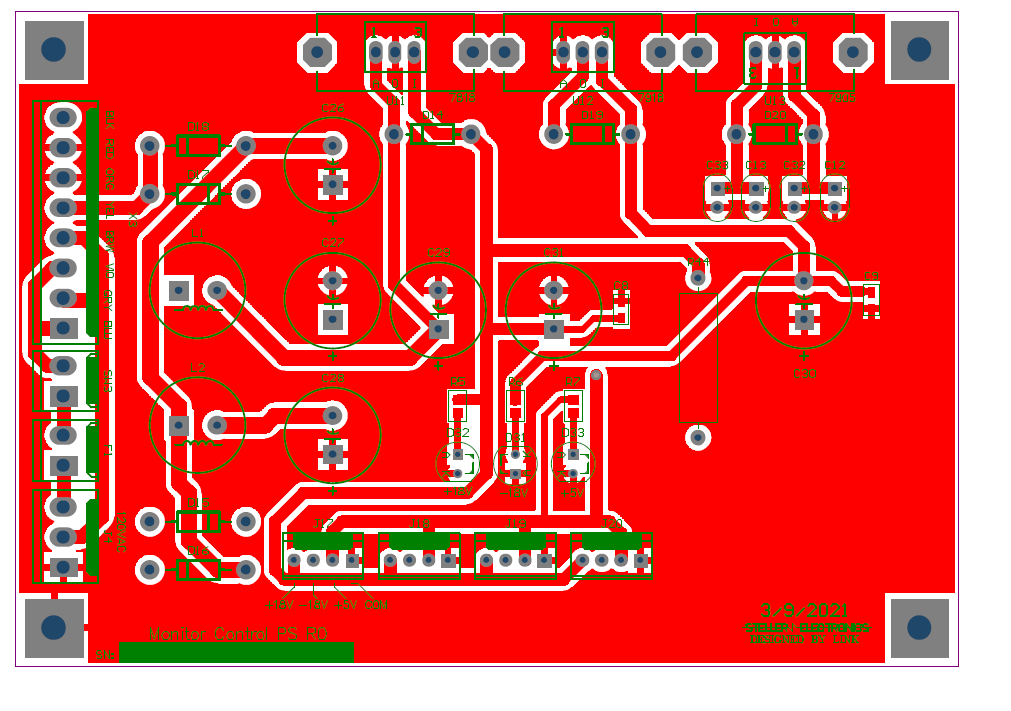
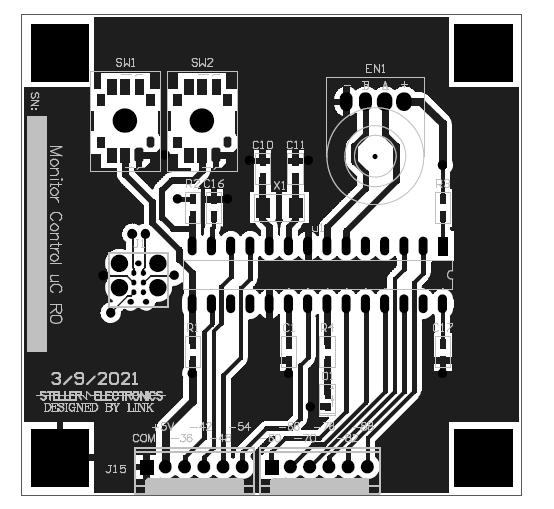
Here is the PCB Layout. I decided to break it into 5 boards to g
Here is the PCB Layout. I decided to break it into 5 boards to give me some flexibility for the enclosure(s) and wiring.
This is the Attenuator section:
This is the Head Phone Amplifier Section:
This is the Meter Section:
This the Power Supply Section:
And this is the Microcontroller section:
Link - there's one thing I meant to ask you in a much earlier po
Link - there's one thing I meant to ask you in a much earlier post: are you sure you want to use 2N3906s in the way you have shown for the relay drivers? Although you can employ PNPs with collector and emitter interchanged for very low saturation voltage, you are not going to get the expected current gain when wired that way.
From what I can see of the board layout, it's not the same. It could just be that you haven't posted the final schematic.
Boswell, post: 468176, member: 29034 wrote: Link - there's one
Boswell, post: 468176, member: 29034 wrote:
Link - there's one thing I meant to ask you in a much earlier post: are you sure you want to use 2N3906s in the way you have shown for the relay drivers? Although you can employ PNPs with collector and emitter interchanged for very low saturation voltage, you are not going to get the expected current gain when wired that way.From what I can see of the board layout, it's not the same. It could just be that you haven't posted the final schematic.
Man your Good! Yes I think I never posted the final schematic ....Or layout...I flipped the collector and emitter on the first schematic....
OK, I thought that might have been the case. Did you also revis
OK, I thought that might have been the case.
Did you also revise the base resistor values? I don't know what your rated relay current is, but assuming it is around 50mA, I would try it with the input drive resistor at 4K7 and the pull-off at 10K. There's going to be quite a thump on the 5V power line when you make an attenuation change that flips a major bit, so I would be inclined to keep the additional currents as low as you can.
Boswell, post: 468178, member: 29034 wrote: OK, I thought that
Boswell, post: 468178, member: 29034 wrote:
OK, I thought that might have been the case.Did you also revise the base resistor values? I don't know what your rated relay current is, but assuming it is around 50mA, I would try it with the input drive resistor at 4K7 and the pull-off at 10K. There's going to be quite a thump on the 5V power line when you make an attenuation change that flips a major bit, so I would be inclined to keep the additional currents as low as you can.
Good point I will play a bit with the values once I get the relays, the spec sheets says 30ma, but I haven't settled on the exact values...
Are you planning to post the schematics of the PCBs as laid out?
Are you planning to post the schematics of the PCBs as laid out? I feel sure you must have made several corrections and other changes to the initial ideas that you did post. In those initial ones, for example, I just noticed that several of the op-amps in the headphone amp and meter boards that receive the balanced signals have their inputs reversed.
In the schematics you posted as "something like this..." the met
In the schematics you posted as "something like this..." the meter circuit and the headphone amplifier circuits have the + and - pins interchanged on the input op amp chips, with the feedback resistors taken to the non-inverting inputs. As far as I can tell, the layouts are correct, but I just wanted to check.
When I've have to correct that sort of thing in the past, I foun
When I've have to correct that sort of thing in the past, I found it simpler to insert the chips with each pair of input legs cropped and bent up to horizontal, and then solder X-wires down into the (unmodified) board. The work can be done on the chip before insertion.
Thanks, this won't be my first time either... unfortunately...
Thanks, this won't be my first time either... unfortunately...
Looking at the gerbers, I think I can do the mod on the PCB before I put the IC on, that way I can solder the part normally. It won't be pretty, but it will allow me to swap ICs without modding the chip itself. I have a fine bit in my dremel perfect for trace cuts, it does a much cleaner job than my exacto knife. I then scrape of the solder mask on the traces with the exacto tip and solder the jumpers.
I have now populated the Meter PCB, and made the repairs to the
I have now populated the Meter PCB, and made the repairs to the input section nd matched the resistors.
(Orange jumpers below). I made few mods to the LM3916 circuit too, It doesn't look pretty but its working.
I also populated the headphone amplifier and made the input repairs and matched the resistors. I was impressed with output amplifier, wish I had tried the BUF634 sooner. I reduced the gain a bit and the circuit works well.
I built the DSPIC30F2010 microcontroller PCB as well. I programmed the rotary encoder to change the Relays controls. I use the CCS complier but some reason had trouble with the built in QEI functions. I had the chip working before, so I am assuming its a compiler issue. But for now the bit banging crude approach is working.
I added a serial port of testing, in the video you can see the text output of the QEI value on the encoder as I turn it. On start up the gain will start at -88dB. When you turn it clockwise the relays will switch in and out different resistor for the H pad attenuator. The unit will go from -88dB to -30dB, which is tailored for my setup. One you hit 100% of the max signal(-30dB) turning the knob clockwise further has no effect. That same is true for turing the know counter clockwise, once you hit -88dB turning the knob further has no effect.
Sorry I had issues uploading to youtube yesterday... On the sc
Sorry I had issues uploading to youtube yesterday...
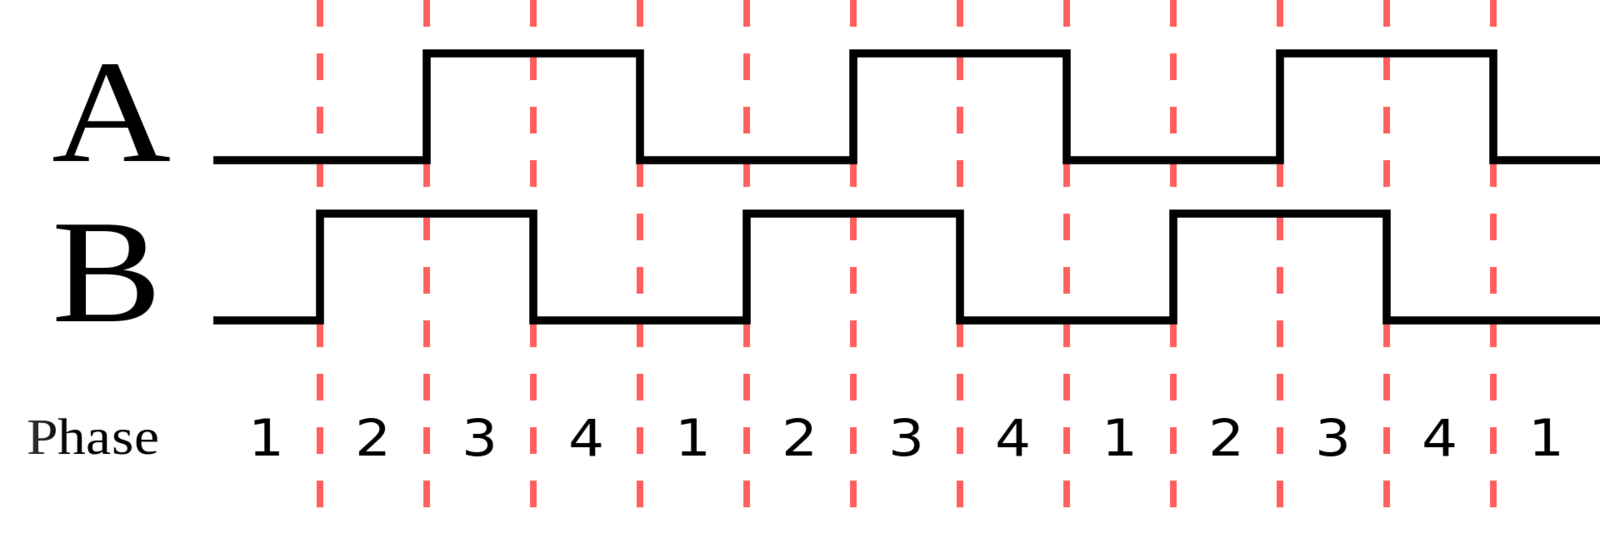
On the scope you can see the encoder A output on channel 1(Yellow) and B on channel 2 (Pink) of the scope. The encoder I am using does not have an index pin to count revolutions. But I don't need that for this application, since a single turn is all that is needed. In fact, I put a upper and lower limit on the encoder, if you turn it up past 100% the code keeps it at 100% regardless of how many clockwise turns you make. Alternatively, if you turn the encoder past 0% the codes keeps it at 0%.
The DSPIC30F2010 has a built in encoder module, but I am having trouble with my complier version accessing that module. Right now the logic is done directly be reading the inputs. If A leads B I know your going clockwise, if B leads A then I know your going counter clockwise. Then I just count pulses to determine how far the knob is rotated.
On start up I wanted to have the attenuation at -88db, from there I will turn it up as necessary. If this proves annoying I can easily store the last setting the non-volatile memory.
Channel three (Blue) on the scope shows one of the relay outputs from the microcontroller. The relays switch in the and out the ten different shunt resistors in the H attenuator. An low output from the microcontroller board inserts the relays associated resistor, and high output takes the resistor out of circuit.
Last night I started populating the attenuator board now. I am using 1% metal film resistor and am matching the critical values with a meter.
256PRR The encoder is one I have used on the industrial side.
256PRR
The encoder is one I have used on the industrial side. A bit overkill for this application, It's pretty high quality.
505Q-0256-S010
Link555, post: 468407, member: 31690 wrote: its pretty small fo
Link555, post: 468407, member: 31690 wrote:
its pretty small for sure, looks like a standard 1/4" pot for four leads. Works great on heavy metal concentrate conveyor belt idlers in pretty horrible operating conditions ;)
I've not attended any heavy metal gigs recently, so I didn't know they used things like that on stage. I can imagine the operating conditions though.
Looks good. Im curious about the feature where the volume knob
Looks good.
Im curious about the feature where the volume knob is limited to a certain peak % of the signal (excuse the layman terms).
Would this be useful in a case where you had some very high power amps on the speakers for headroom, so that you could never accidentally turn things up to a dangerous volume level?
Ive become paranoid lately thinking about an atmos system id like to have because the wattage is would be really high, and im concerned about a failure or accident letting the thing output 5 or 10 thousand watts.
kmetal, post: 468464, member: 37533 wrote: Looks good. Im curi
kmetal, post: 468464, member: 37533 wrote:
Looks good.Im curious about the feature where the volume knob is limited to a certain peak % of the signal (excuse the layman terms).
Would this be useful in a case where you had some very high power amps on the speakers for headroom, so that you could never accidentally turn things up to a dangerous volume level?
Ive become paranoid lately thinking about an atmos system id like to have because the wattage is would be really high, and im concerned about a failure or accident letting the thing output 5 or 10 thousand watts.
this Unit does not have a limiter in it, but what I did was set up the unit to have a minimum attenuation of -30db. So when my volume knob is at it’s loudest position I still have a -30db pad in the circuit. I measured my room and speakers and found the pad value to give me 85db out of my speakers from my listening position. That turned out to be a -30db pad. From there I can turn the unit down further by 10 steps of roughly 6 db each. But in practice I think I could get by with 3 or four...
Similar by terms
- New monitor controller, an overview of the PreSonus Monitor Station V2.
- Digi 003 Controller- Issues with power sequence- Too Many Relay Clicks
- Lucid R3-- transparent mic preamp with optional jfet based harmonic drive
- Attenuators with transformer preamps, a good idea ?
- Grace Design m908 monitor controller






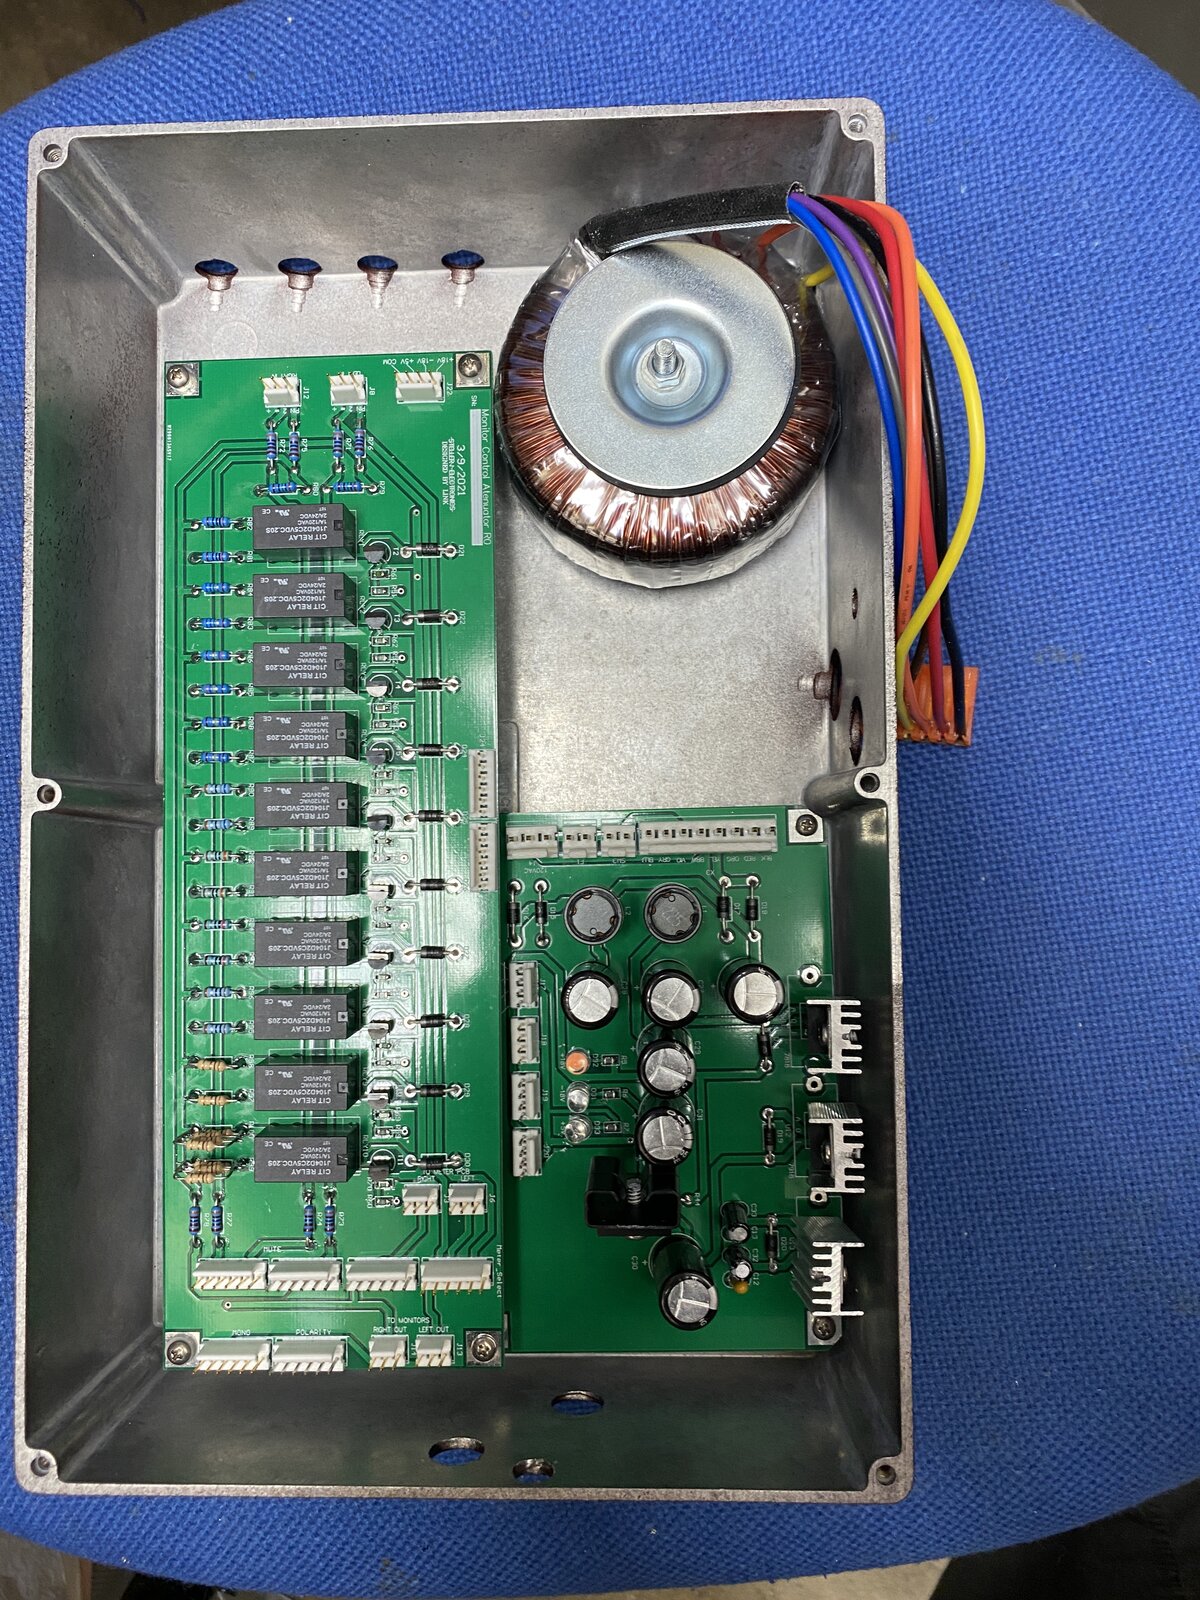



Can i see what the inside is like? I was thinking this might be
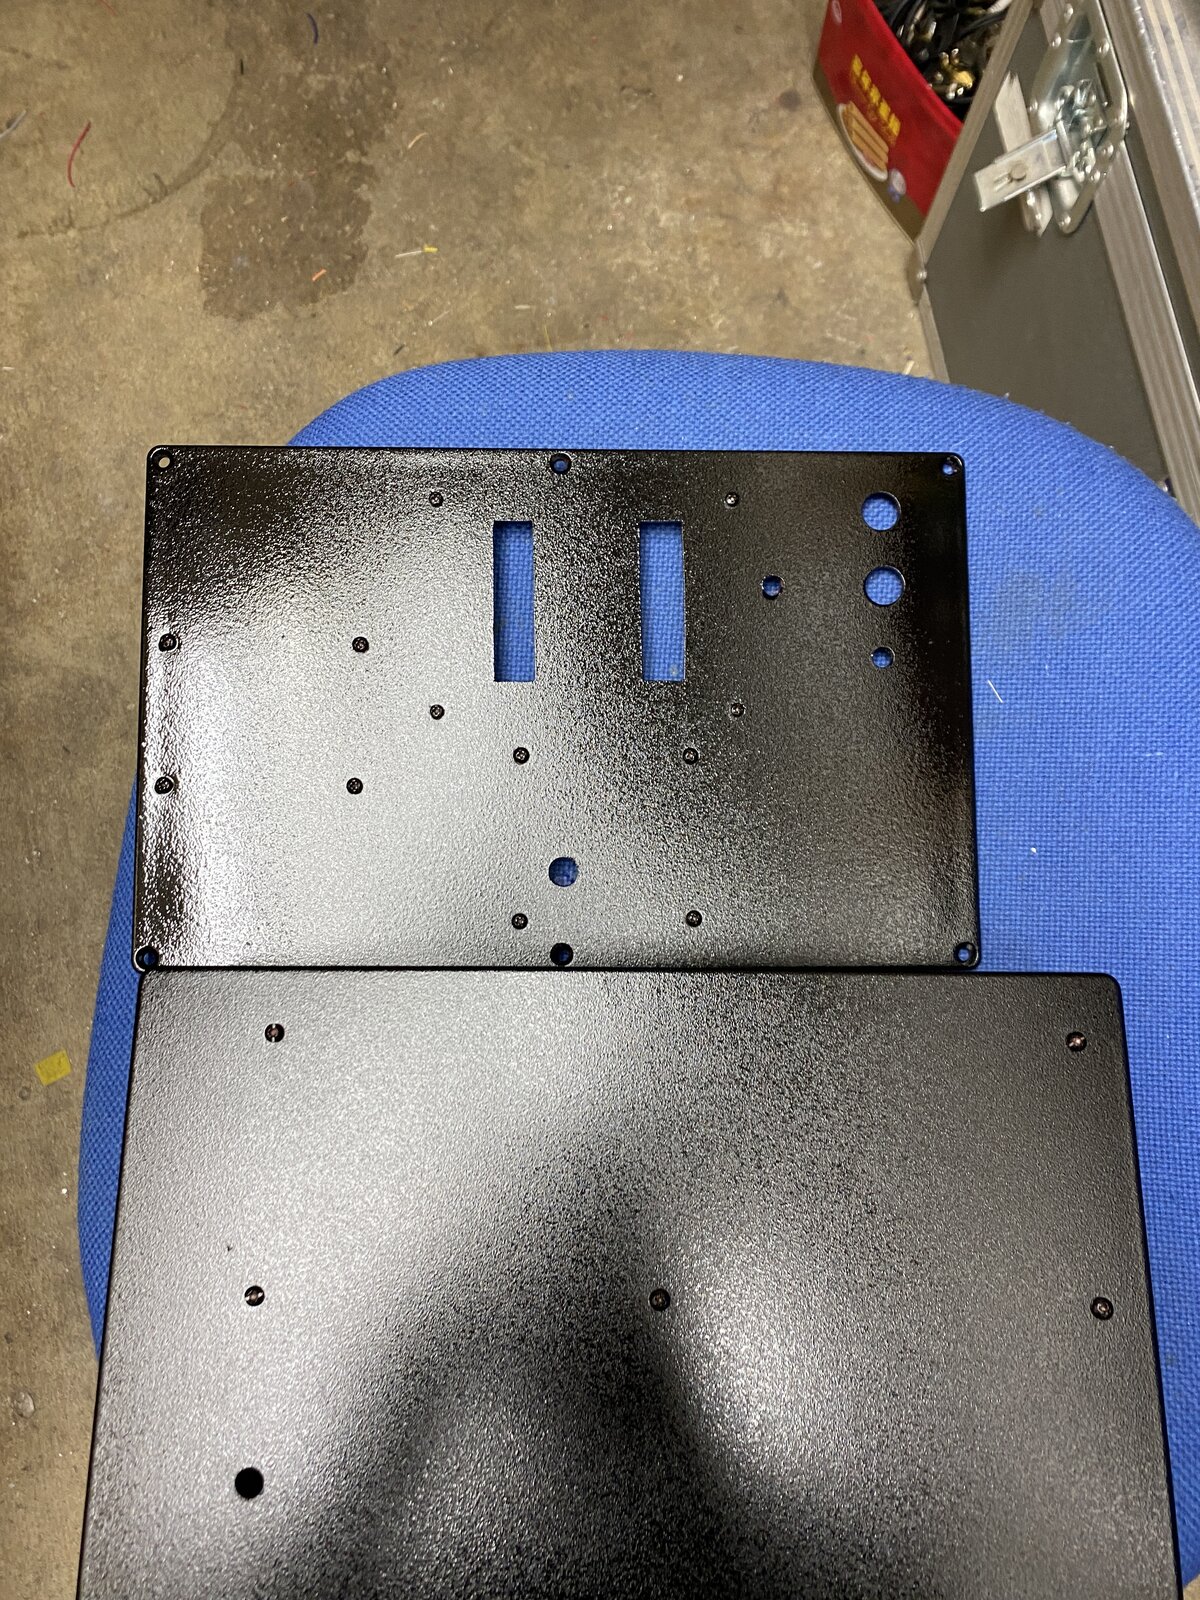
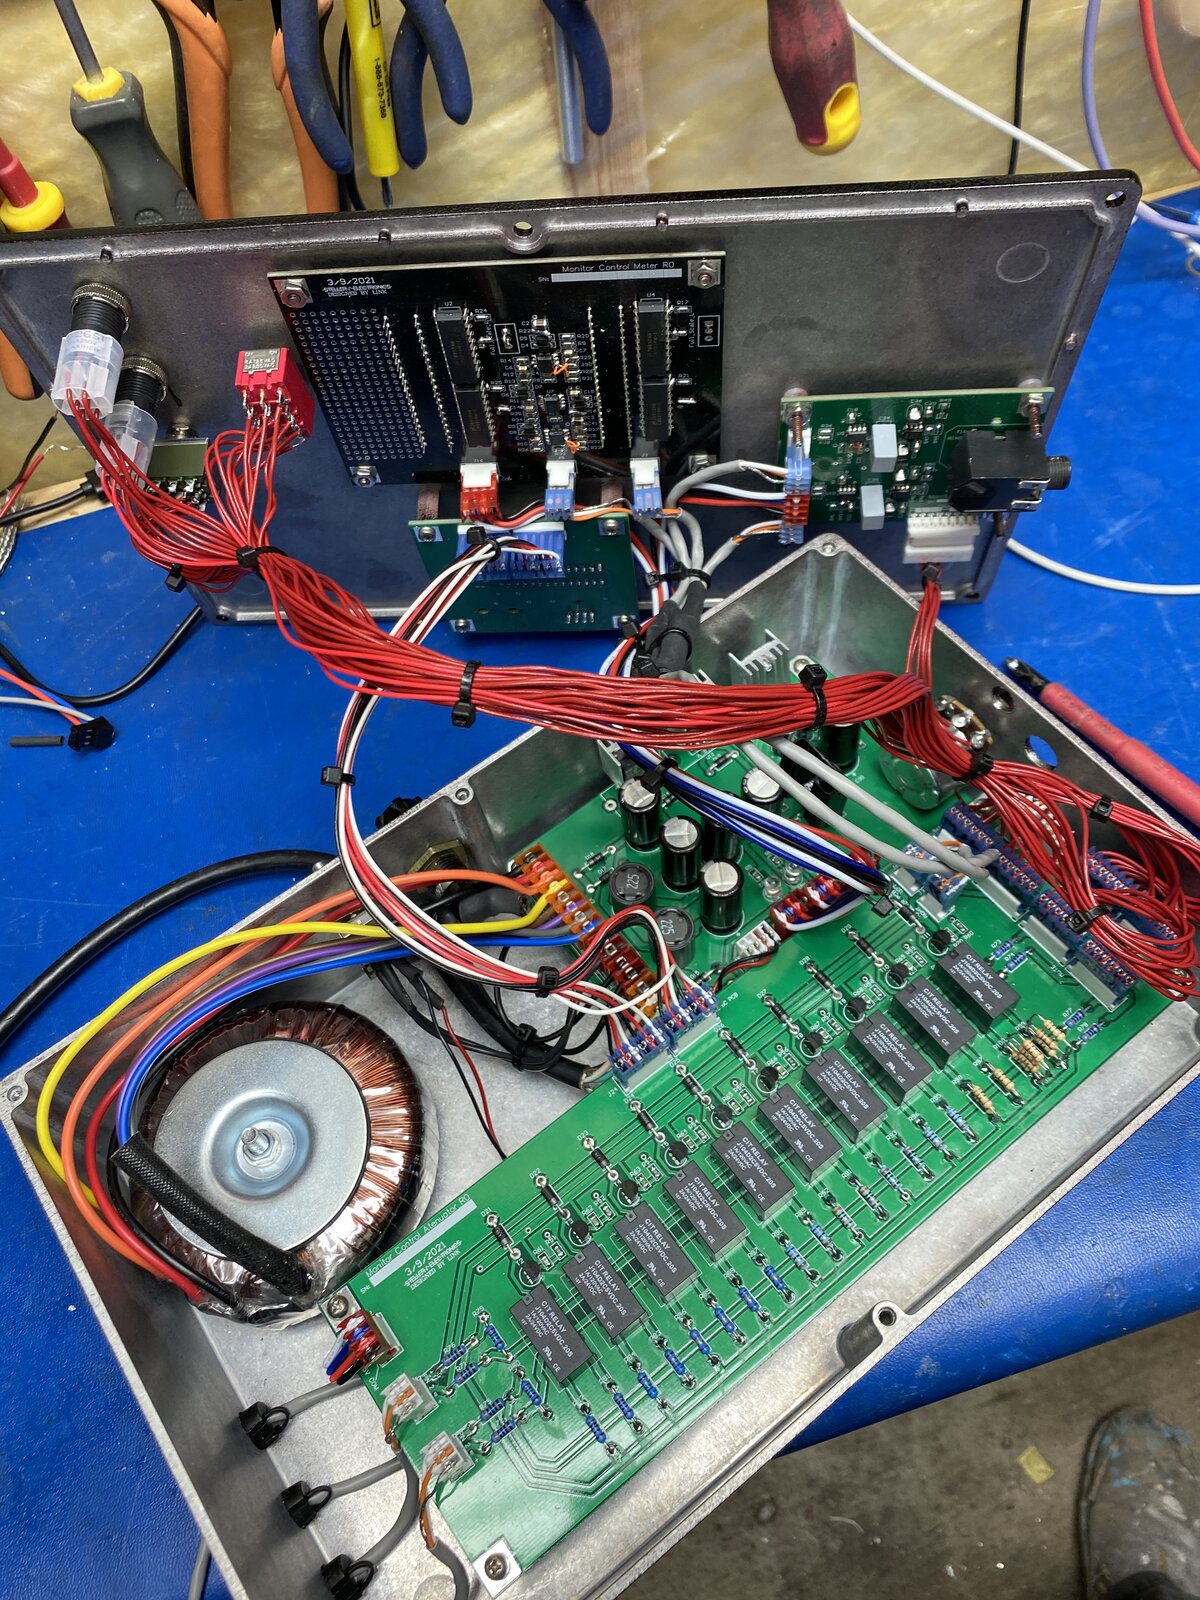
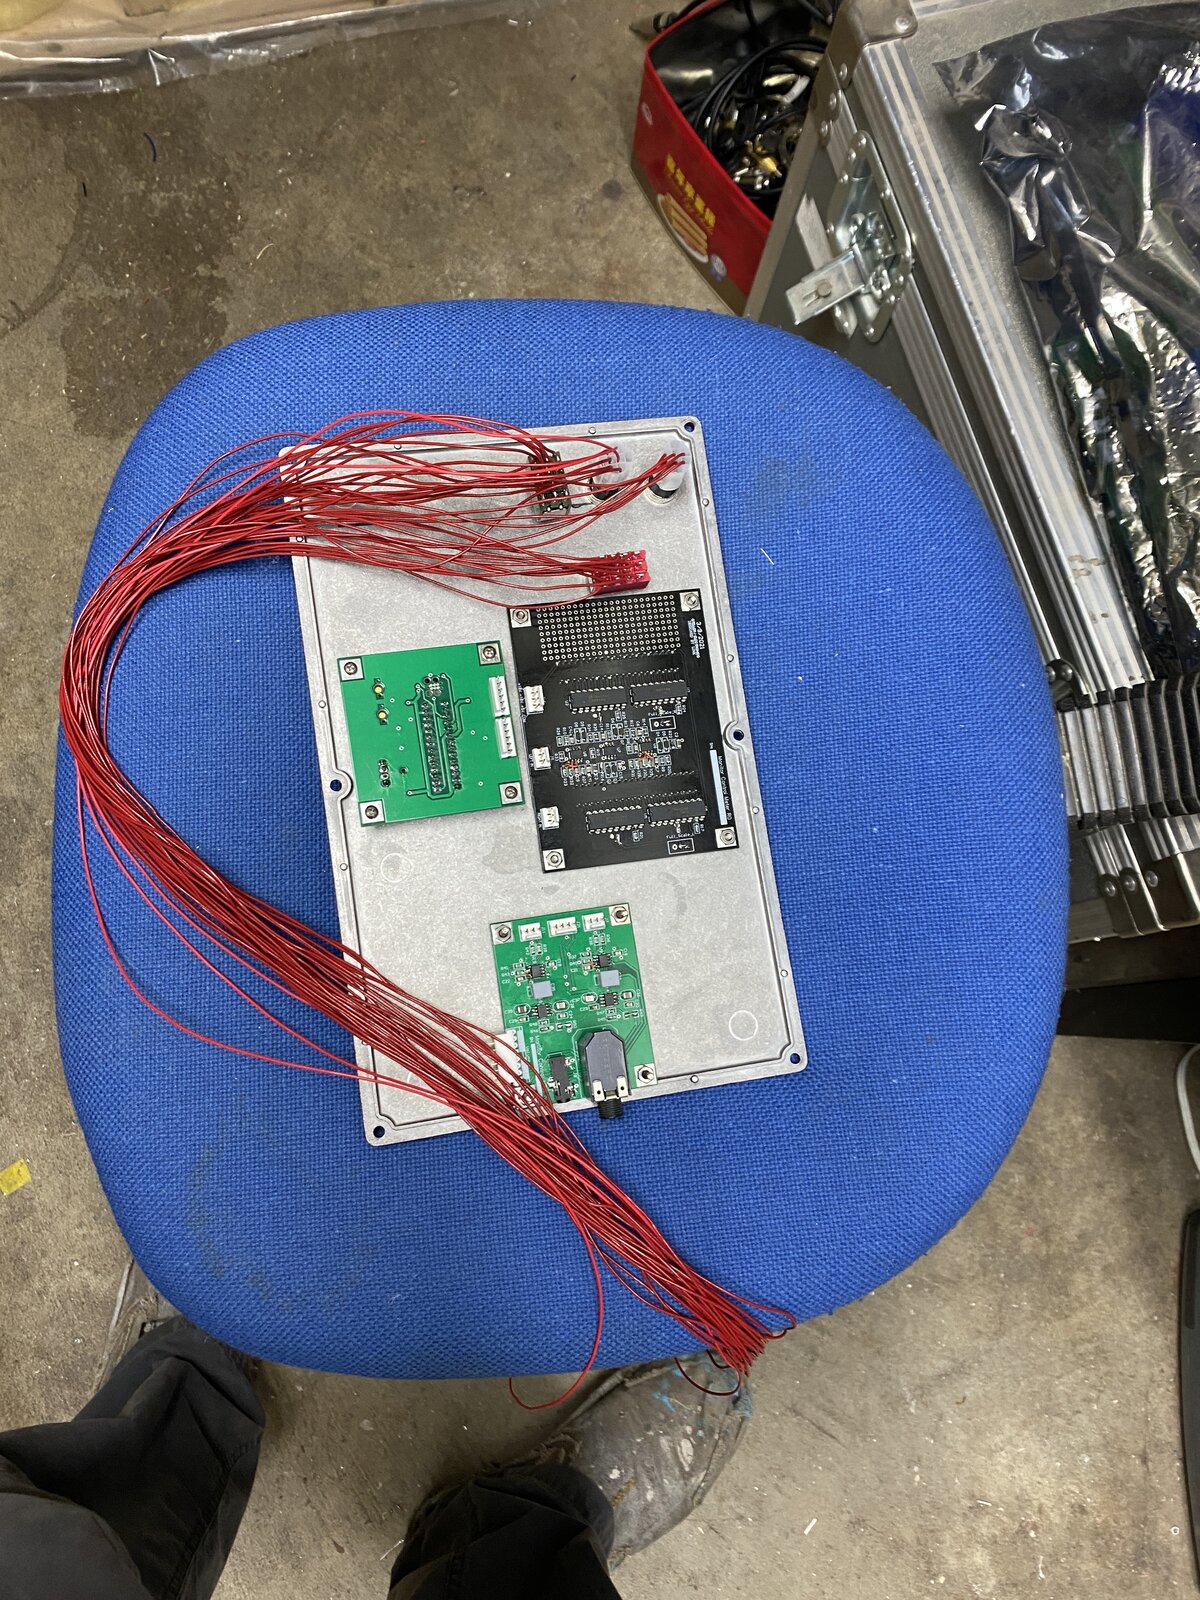
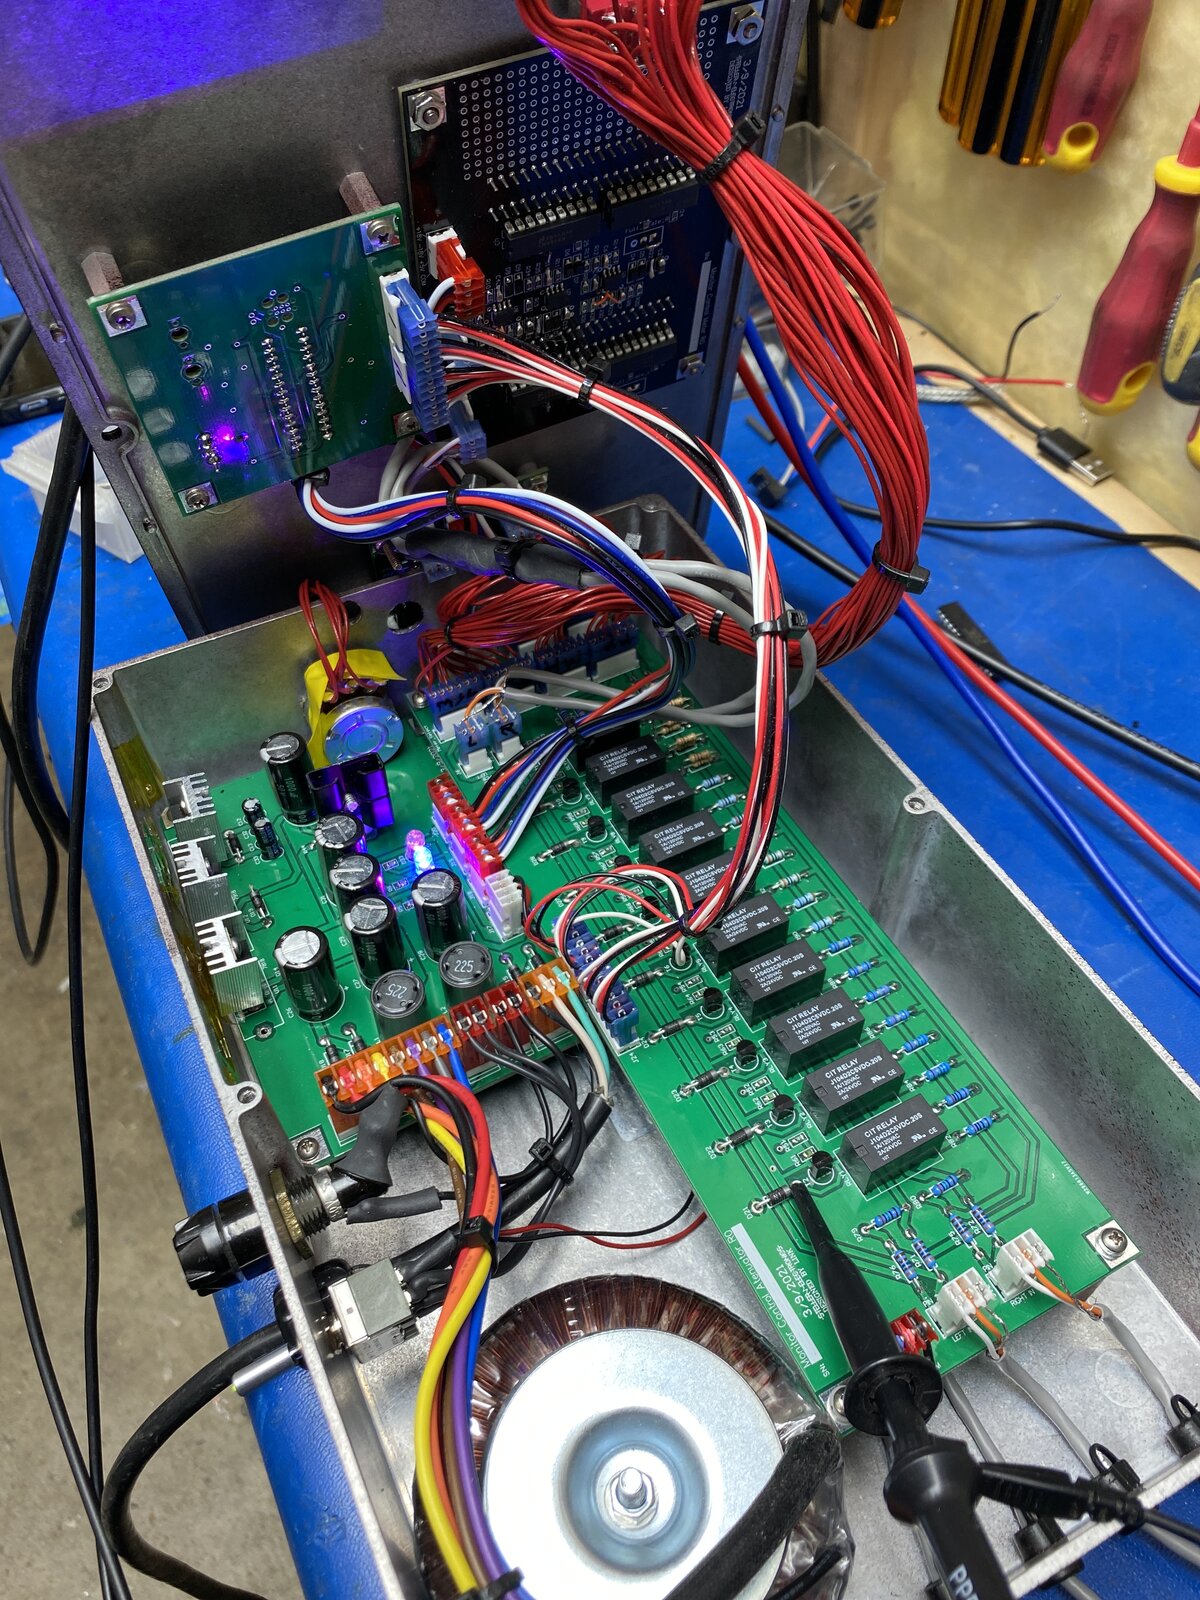
Can i see what the inside is like? I was thinking this might be a good first project for me to try. If you don't have pics no big deal, just curious if its entry level or not.