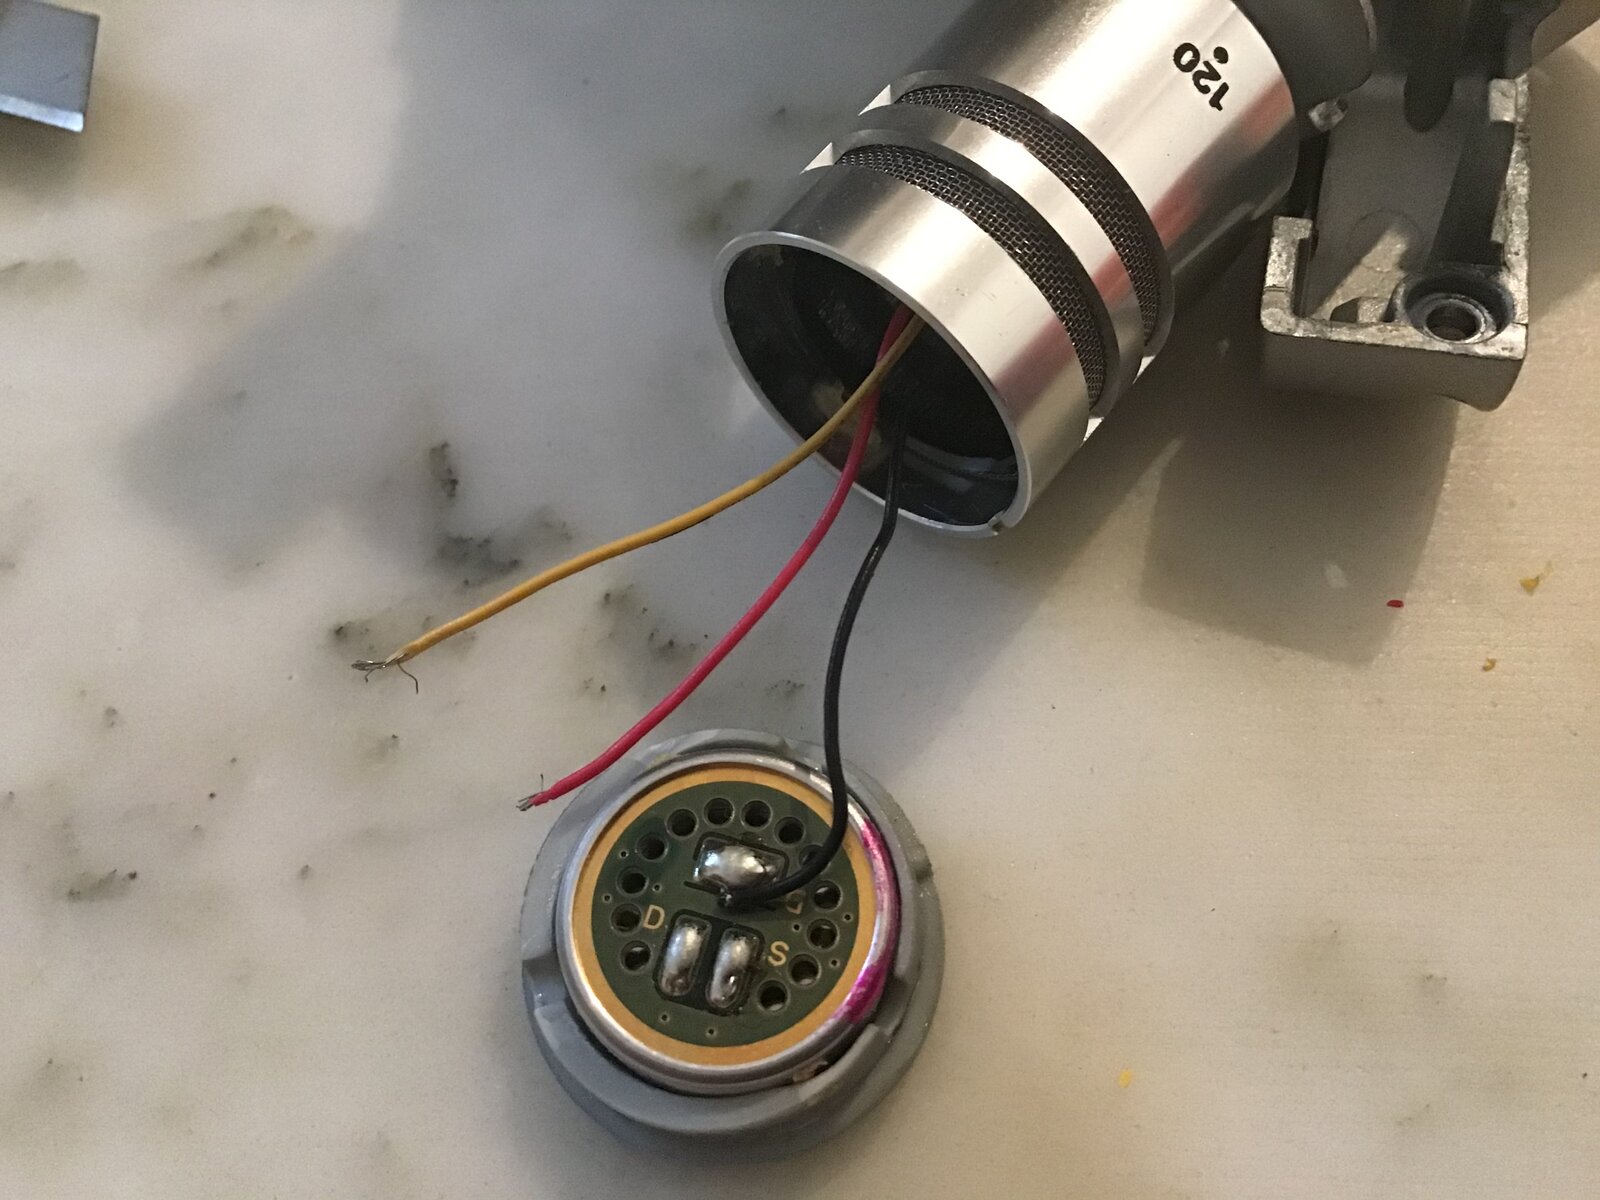
Hi, my left stereo channel of the Zoom H6 capsule started with buzz sounds than it got worse with a hiss sound, then I opened it and realized that the cables was detached like in this picture I took today when I disassembled it.
can you tell me how to solder it please? If you can draw on the picture where to exactly solder the 2 cables I would be really grateful
thx a lot
Comments
Boswell, post: 464636, member: 29034 wrote: OK, but what colour
Boswell, post: 464636, member: 29034 wrote: OK, but what colour wires connect to the three solder pads in the right hand capsule?
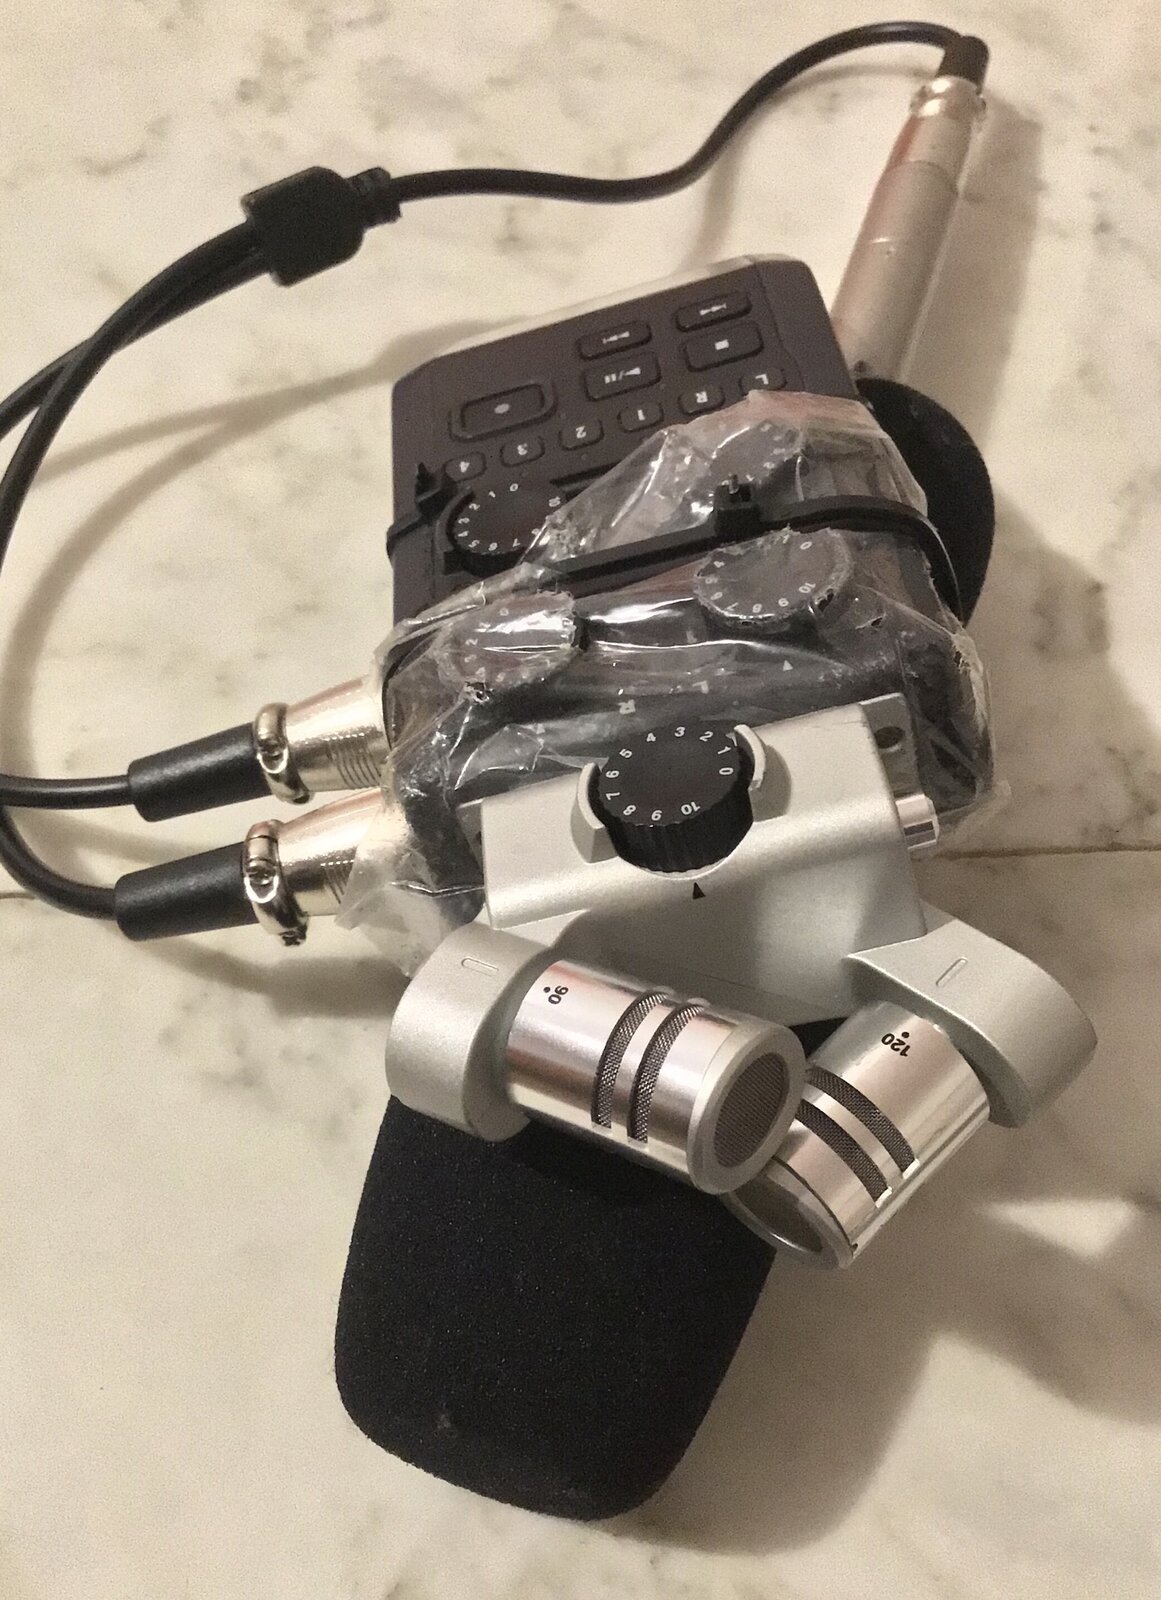
Yeah that’s something I wanted to do but I couldn’t: to open the other capsule and check the scheme, but I need that microphone capsule for a work I’m doing and I cant risk to open and detach the cables for mistake. I’m actually in troubles because I would need stereo recording for a field recording work and I usually use my XY zoom H6 for that. Now I’m using only one capsule of the zoom h6 plus a rode ntg3 sticked to the device to cover the other channel for the XY (very bad unmatched pairs but I’m really into an emergency)
This is the picture you can take a look lol
Daayeah, post: 464638, member: 51956 wrote: I had an insane idea
Daayeah, post: 464638, member: 51956 wrote: I had an insane idea! Do you think I could solder a pairs of Primo em 172 into that module if I detach the old capsule?
I don't think that would work very well. The EM172 is a unidirectional capsule rather than a cardioid.
If you have a multimeter, you could probably do some identification work on the wires that have become detached. If you set to H6 to record and measure the voltage between the two detached wires in the capsule, you should find 3 to 5 Volts between them. The positive one of that pair will go to the source (S), and other to the drain (D). Leave the gate (G) connected as it is. Take care that the wires do not touch one another or the case of the capsule while doing this check. Turn the H6 off fully when reconnecting the wires.
When I used to fix things for my job, I learned pragmatism early
When I used to fix things for my job, I learned pragmatism early on.
1. It's broken and doesn't work.
2. The end result will be either repair or replacement.
3. If a decision has to be made based on guesswork, will choosing one option change number 2?
4. Make the guess.
5. If it works, it's a win.
6. If it doesn't, try the other option.
7 if this works, it's a win.
8. Replace the item.
In this example, you have two choices. So solder them back, and see if it works. If it doesn't, swap them and check again.
If it fails to work on either orientation, buy a new one.
You use your best efforts to research, but circuit diagrams are a thing of the past.
Personally, I like the idea of opening the other one and checking the colour against pub marking. I would do this. If I Gelt I couldn't do this, then should you be doing the broke one?
I saw some pictures of that mic opened up. The colors to the oth
I saw some pictures of that mic opened up. The colors to the other capsule are different.
https://www.wildtronics.com/zoomh6mod.html#.Xu21_GhKi70
I might get brave and just touch the wires to the solder and see what works. Or I might look at the little circuit board it's attached to and see if I can deduce what goes where by comparing it to the other side, but that would mean opening up that capsule housing as well. Then again, the circuit board might just have the corresponding letters printed on it.
Best ignore what I said in my earlier post about the capsule typ
Best ignore what I said in my earlier post about the capsule types and connections. I had two different pages open describing the EM172, and I hadn't spotted that they gave different information, sorry.
That's an interesting article about increasing the gain of the H6 microphone inputs, despite a glaring error concerning noise levels. The wires to the capsules appear to be yellow, red, black to the left and yellow, red, white to the right, i.e. the only difference is the black/white, which must be the output. However, it doesn't make sense that the black wire is connected to the G pad on the capsule you opened, so the colours may be random.
What's the actual problem in opening up the right hand capsule? You are not going to stop it working by having a look at how it is wired, taking a photo and then closing it up again.
.
I just dont see it as brave. I’ve always wanted to know how thin
I just dont see it as brave. I’ve always wanted to know how things work and when I was a teen I experimented, frankly looking back, quite dangerously but got a healthy respect, then understanding of these things. We didn’t have the internet to learn to solder so you had to work it out for yourself. I had a shure 545 with no connector for cable so finding the right connection was difficult but I got there. I’d really encourage experimentation because modern kit like this very rarely dies even when polarising voltages get applied where they shouldn’t. The electrets in radio boom mics are good examples. You swap and link three cores till they work. I’ll be never heard of anyone destroying one! Dab the leads on and see which suddenly feeds back with the levels turned up!
Paul's on the dot here. I must have soldered electret capsules w
Paul's on the dot here. I must have soldered electret capsules wrong tens of times. Never hurt the capsule. It even works on some with wrong polarity, as the FET doesn't care about it. Of course, in that case, polarity of the signal is also reversed.
However, I'd like to add that soldering wires to a typical electret isn't as easy as it might seem. Soldering too long can damage the capsule. Usually you'll get less signal, more white noise. Especially noticeable when used in a stereo pair.
So solder very fast with a hot soldering iron. If you've never done it, get replacement capsules first and/or practice a lot before doing the capsule.
What about making an adapter for these modules?
I have a Zoom F4 and one of these modules. I'm interested in the F6, but was annoyed to find that it doesn't accept these modules.
So do you think I could make an adapter, to plug this thing into another type of mic input? There aren't that many contacts in the connector, but I don't have a pinout. I also don't know what kind of mic input it would require.
Thanks for any insight!


I would guess the red wire goes on S (signal?), with D standing
I would guess the red wire goes on S (signal?), with D standing for drain and G standing for ground (black wire being typical). Maybe let one or two others weigh in before taking my suggestion as gospel truth.